Table of Contents
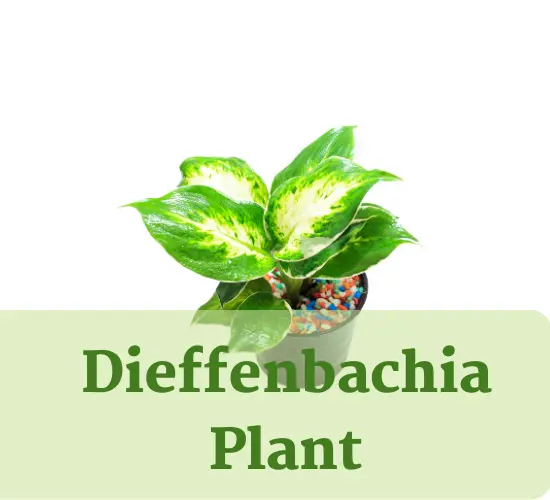
Dieffenbachia Care
Leopard Lily, also known as Dieffenbachia, is a popular houseplant that provides a touch of natural beauty to indoor spaces. This low-maintenance plant is native to Mexico, South America, and the West Indies and is known for its interesting leaf patterns that can grow up to 5 feet indoors.
However, it’s important to note that while this plant is beautiful, it’s also toxic to both pets and humans if ingested.
In this article, we’ll provide essential care tips to keep your Leopard Lily healthy, strong, and growing. Whether you’re a seasoned plant enthusiast or a beginner, these tips will help you care for your plant with ease and confidence.
From understanding its facts and characteristics to addressing common issues and solutions, we’ll equip you with all the knowledge you need to ensure your Leopard Lily thrives in your home.
So sit back, relax, and learn how to care for this popular houseplant with ease and simplicity.
Key Takeaways
- Leopard Lily is a popular houseplant with interesting leaf patterns that can grow up to 5 feet indoors, but it is toxic to pets and humans if ingested.
- Dieffenbachia is another low-maintenance houseplant with unique leaf patterns that can be propagated through stem cuttings or division, but it is also toxic if ingested and requires proper watering techniques to prevent root rot.
- To keep both plants healthy, they need bright, indirect light and can tolerate average household humidity. Pruning and fertilizing can promote fuller, bushier growth, and legginess can be prevented with more light and pruning.
- Yellow leaves in Dieffenbachia can be prevented with filtered or rainwater, and dry air can be mitigated by misting or using a humidifier. Both plants tolerate lower light environments and can be used to create new plants.
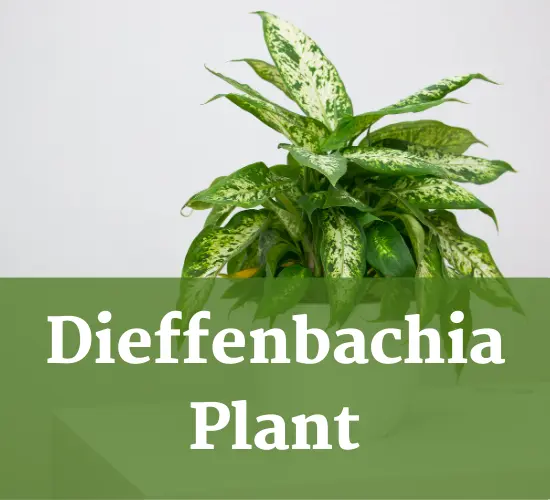
Dieffenbachia the Beauty of Tropical Foliage
The world of Dieffenbachia is an enchanting realm adorned with captivating foliage and a fascinating botanical legacy. This tropical gem, native to the verdant rainforests of Central and South America, has graced homes and gardens for centuries, captivating plant enthusiasts worldwide. Its name honors Joseph Dieffenbach, a German botanist who first unveiled and classified the plant in the mid-1800s, forever etching his mark on its remarkable story.
A Botanical Jewel Among Araceae Royalty
Dieffenbachia proudly belongs to the Araceae family, a distinguished group of plants that encompasses lilies, calla lilies, and peace lilies. This family is celebrated for its stunning foliage and remarkable adaptability to diverse environments, making Dieffenbachia a true treasure among its fellow Araceae members.
Distinguishing Traits that Set Dieffenbachia Apart
The plant’s distinctive characteristics elevate it to a league of its own among the indoor plant world. Its bold, variegated leaves, painted with hues ranging from creamy white to deep, emerald green, showcase nature’s artistry in all its splendor. Dieffenbachia’s upright growth form lends a touch of elegance to any space, while its tolerance for moderate to low light conditions makes it a versatile addition to a variety of home settings.
A Spectrum of Leaf Patterns and Color Variations
With over 80 diverse species and countless cultivars, Dieffenbachia offers an unparalleled range of leaf patterns and color variations, catering to every plant enthusiast’s taste. Whether you’re captivated by the striking contrast of crisp white and verdant green or enchanted by the subtle hues of purple and silver, there’s a Dieffenbachia variety that’s sure to capture your heart and adorn your home with a touch of tropical elegance.
Facts and Characteristics
Dieffenbachia, a low-maintenance houseplant native to Mexico, South America, and the West Indies, is characterized by its interesting leaf patterns, ability to tolerate less-than-ideal conditions, and common name, Leopard Lily, due to the distinctive striped pattern on its leaves.
There are many different species of Dieffenbachia, each one with unique leaf patterns that make it a popular choice for houseplant enthusiasts. Some of the interesting varieties include Dieffenbachia Maculata(Dieffenbachia Seguine), which has dark green leaves with white spots, and Dieffenbachia ‘Camille’, which has green leaves with a creamy yellow margin.
Propagation methods for Dieffenbachia include stem cuttings, which can be taken from the plant and rooted in water or soil. It is important to use a clean and sharp tool to make the cut and to remove any leaves from the bottom of the stem before placing it in water or soil.
Dieffenbachia can also be propagated through division, where the plant is carefully removed from its pot and separated into smaller sections, each with its own roots and stems. This method can be used to create new plants or to rejuvenate an older plant that has become too large for its pot.
Optimal Care Conditions for a Thriving Dieffenbachia
To ensure optimal growth, it is important to provide bright, indirect light and proper watering techniques for Dieffenbachia. This species prefers bright, indirect light and temperatures between 60-80°F. However, it can tolerate lower light environments and can even adapt to fluorescent light, making it a great office decoration.
Watering frequency is also important for this plant. It is recommended to water when the soil volume is 50-75% dry and to remove excess water from the saucer. Overwatering can lead to root rot, which can be fatal to the plant. Additionally, yellow leaves can be prevented by watering with filtered water or rainwater.
Fertilizing is also important for the growth of Dieffenbachia. It is recommended to fertilize once per month during spring and summer with general-purpose houseplant fertilizer diluted to half-strength.
This species can tolerate average household humidity, but it is important to avoid dry air which can cause the leaves to brown and curl. If yellow leaves appear, it is best to remove them to keep the plant strong and growing.
Light Requirements for Healthy Leaf Growth
Dieffenbachia is a beloved houseplant treasured for its lush, vibrantly patterned leaves. To maintain its health and promote vigorous leaf growth, understanding its light requirements is essential. This comprehensive guide delves into the nuances of Dieffenbachia’s light preferences, ensuring your plant thrives and continues to grace your home with its exquisite beauty.
Bright, Indirect Light: The Ideal Illumination
Dieffenbachia, hailing from the dappled sunlight of tropical rainforests, thrives best in bright, indirect light. Aim to provide approximately 8 hours of bright, indirect light per day, mimicking its natural habitat. This balanced illumination allows for optimal photosynthesis, promoting vibrant leaf growth and maintaining the plant’s captivating patterns.
Consequences of Insufficient and Excessive Light
Insufficient light can lead to slow growth, leggy stems, and pale, washed-out leaves. In extreme cases, low light may diminish or fade the plant’s variegation. Conversely, excessive light, particularly direct sunlight, can cause leaf scorch, manifesting as brown, wilted leaves. Finding the right balance between too little and too much light is crucial for Dieffenbachia’s well-being.
Positioning Your Dieffenbachia for Optimal Light Exposure
When placing your Dieffenbachia, prioritize locations with bright, indirect light. North- or east-facing windows are ideal, providing ample illumination without direct sun exposure. Avoid positioning near south- or west-facing windows, where the intense sunlight can scorch the leaves. If such placement is unavoidable, consider using a sheer curtain to diffuse the light and protect the plant. Regularly rotating the plant ensures even light distribution, promoting uniform growth and preventing one side from becoming leggy while the other remains underdeveloped.
Light Intensity and Duration: Striking the Right Balance
Light intensity, measured in lumens or foot candles, should be moderate, ranging from 200 to 500 foot candles. Avoid placing Dieffenbachia in excessively bright locations, where light intensity exceeds 500 foot-candles. Excessive intensity can overwhelm the plant’s photosynthetic processes, leading to photobleaching or damage. Light duration, the total amount of light exposure per day, should be around 8 hours. In low-light conditions, consider supplementing with artificial grow lights to maintain adequate light exposure and prevent etiolation, a condition characterized by weak, elongated stems and pale leaves.
Light Type and Color: Choosing the Right Spectrum
Dieffenbachia prefers light in the blue and red spectrum, which promotes photosynthesis and leaf growth. Avoid placing it under warm-colored lights, such as incandescent or halogen bulbs, as these emit excessive heat and can damage the plant. Warm-colored lights emit more infrared radiation, which can cause leaf burn and disrupt the plant’s natural growth cycle.
Light Distance: Finding the Sweet Spot
Maintain a distance of approximately 2-3 feet between the plant and the light source. This prevents excessive heat and light intensity, which can scorch the leaves. Too close placement can lead to leaf burn while placing the plant too far away can result in insufficient light and stunted growth.
By providing the right amount of bright, indirect light, you can ensure your Dieffenbachia flourishes and continues to adorn your home with its vibrant foliage. Remember, light intensity, duration, type, color, and distance all play a role in optimizing the plant’s light exposure and promoting healthy growth. With proper care and attention to its light requirements, your Dieffenbachia will thrive for years to come, adding a touch of tropical elegance to your living space.
Nurturing Dieffenbachia’s Roots by Optimal Soil Composition and Proper Potting
Ideal Soil Composition: A Symphony of Draining and Aerating Elements
Dieffenbachia, hailing from the humid rainforests of Central and South America, thrives in a well-draining potting mix that mimics its natural habitat. A well-balanced soil mixture should include a combination of peat moss, perlite, and potting soil.
- Peat moss: This partially decomposed sphagnum moss acts as a natural sponge, retaining moisture without becoming waterlogged, and preventing root rot, a common issue that can occur in soggy soil.
- Perlite: This lightweight volcanic rock enhances drainage and aeration, allowing excess water to escape and providing ample air circulation around the plant’s roots.
- Potting soil: This combination of organic matter and mineral components provides essential nutrients for healthy growth.
Repotting Dieffenbachia: Ensuring a Roomy Home for Thriving Roots
As Dieffenbachia matures, its root system expands, requiring a larger container to accommodate its growth. Repotting typically occurs every two to three years or when the plant outgrows its current pot.
To repot your Dieffenbachia:
- Choose a new pot: Select a container that is at least one size larger than the current one and ensure it has drainage holes to allow excess water to escape.
- Prepare the pot: Place a layer of the soil mixture at the bottom of the new pot.
- Remove the plant: Carefully remove the Dieffenbachia from its current pot, gently detaching it from the sides and bottom. Aim to keep the root ball intact, minimizing root damage.
- Position the plant: Position the plant in the new pot, ensuring it sits at the same depth as it was in the previous pot.
- Fill in the space: Fill in the space around the plant with the soil mixture, pressing gently to remove any air pockets.
- Water thoroughly: Water the plant thoroughly after repotting to help settle the soil.
Additional Considerations for Optimal Soil Health
While providing the right soil composition and repotting at the appropriate intervals is crucial, additional factors contribute to Dieffenbachia’s soil health:
- Soil pH: Dieffenbachia prefers slightly acidic soil with a pH range between 6.0 and 6.8. Monitoring soil pH and adjusting it as needed ensures optimal nutrient uptake and prevents root stress.
- Nutrient Content: A regular fertilization schedule, particularly during the active growing season, provides essential nutrients for healthy growth and vibrant foliage.
- Pest and Disease Management: Maintaining a clean and pest-free environment, along with regular inspections for signs of disease, helps prevent infestations and protect the plant’s health.
- Pruning: Pruning leggy or damaged stems encourages new growth and maintains the plant’s shape.
By providing the right soil composition, repotting at the appropriate intervals, and maintaining optimal soil health, you can ensure your Dieffenbachia flourishes and continues to adorn your home with its captivating foliage for years to come. Remember, healthy roots form the foundation for thriving Dieffenbachia, adding a touch of tropical elegance to your living space.
Dieffenbachia’s Nutritional Needs: A Balanced Diet for Optimal Growth
Dieffenbachia plants thrive when provided with a balanced diet of essential nutrients. These nutrients, including nitrogen, phosphorus, and potassium, play crucial roles in various plant functions, from promoting healthy foliage to encouraging vibrant blooms. A well-balanced fertilizer, often recommended as a 20-20-20 blend, provides these essential nutrients in equal proportions, ensuring the plant’s overall well-being.
Regular Fertilization: Fueling Growth During the Active Season
Regular fertilization during the active growing season, typically spanning the spring and summer months, is essential for Dieffenbachia’s development. This period of rapid growth demands an extra boost of nutrients to support the plant’s vigorous expansion and foliage production. Applying fertilizer during this time ensures the plant receives the necessary nourishment to maintain healthy leaves and vibrant blooms.
A Balanced Liquid Fertilizer: A Gentle Nutrient Delivery System
A balanced liquid fertilizer, diluted to half strength, is recommended for use every two to four weeks during spring and summer. This gentle approach provides Dieffenbachia with a steady supply of nutrients, promoting healthy growth and preventing nutrient deficiencies.
Avoiding Overfertilization: Striking a Balance for Root Health
While regular fertilization is crucial, overfertilization can lead to nutrient burn, damaging the plant’s roots and overall health. The fertilizer requirements for Dieffenbachia vary depending on its growth conditions. For instance, plants in shady areas may require less fertilizer, while those exposed to full sun may need more frequent fertilization. Observing the plant’s growth habits and adjusting the fertilizer schedule accordingly is essential.
Fertilizer Application: Ensuring Nutrient Uptake and Effective Watering
When applying fertilizer to your Dieffenbachia, it is important to water the plant well both before and after fertilization. Watering before fertilization helps to moisten the soil and prepare it for nutrient uptake. After applying the fertilizer, watering ensures that the plant’s roots effectively absorb the nutrients.
Providing the right nutrition and fertilization for your Dieffenbachia is key to its optimal growth. By understanding its nutritional needs, applying a balanced liquid fertilizer regularly, and avoiding overfertilization, you can ensure your Dieffenbachia thrives and continues to add a touch of tropical elegance to your indoor or outdoor space. Remember, a healthy root system, nourished by a balanced diet of nutrients, forms the foundation for a vibrant and flourishing Dieffenbachia.
Pest and Disease Management for a Healthy Plant
Dumb cane can be susceptible to various pests and diseases. Understanding these threats and how to manage them is crucial for maintaining a healthy plant.
Common Pests: Uninvited Guests and Their Impact
Several pests can infest Dieffenbachia, causing damage to its leaves and overall health. Here are some of the most common offenders:
- Spider mites: These tiny, spider-like creatures weave webs on the undersides of leaves, causing them to turn yellow and drop.
- Mealybugs: These small, white insects appear as fluffy masses on the stems and leaves, sucking sap and weakening the plant.
- Scale insects: These hard-bodied insects attach themselves to the stems and leaves, feeding on the plant’s sap and causing discoloration.
Organic Pest Control: A Gentle Approach to Pest Elimination
While chemical pesticides can be effective in eliminating pests, they may also pose risks to your health and the environment. Consider these organic pest control methods as alternatives:
- Neem oil: Extracted from the neem tree, neem oil is a natural pesticide that effectively controls a wide range of pests, including spider mites, mealybugs, and scale insects. Apply diluted neem oil solution directly to affected areas.
- Insecticidal soap: Made from fatty acids, insecticidal soap kills pests by disrupting their cell membranes. Apply insecticidal soap solution to all parts of the plant, ensuring thorough coverage.
Preventive Measures: Safeguarding Your Dieffenbachia from Infestations
Regular inspections of your Dieffenbachia can help detect pests early on, allowing for prompt treatment and preventing widespread infestation. Here are some preventive measures to consider:
- Quarantine new plants: Before introducing new plants to your collection, isolate them for a few weeks to ensure they are pest-free.
- Maintain cleanliness: Regularly wipe down the leaves and stems of your Dieffenbachia to remove dust and debris, which can provide hiding places for pests.
- Encourage air circulation: Good air circulation around the plant can help discourage pests from settling.
Fungal and Bacterial Diseases: Understanding and Addressing Plant Ailments
Dieffenbachia can also be affected by various diseases, some caused by fungi and others by bacteria. Here are two common diseases to be aware of:
- Bacterial leaf spot: This disease causes small, water-soaked spots on the leaves, which can eventually turn brown and necrotic.
- Fungal root rot: This disease affects the roots, leading to wilting, yellowing leaves, and eventually plant death.
Treatment and Prevention: Combating Diseases and Maintaining Plant Vitality
To treat bacterial leaf spots, remove affected leaves and avoid overhead watering, which can spread the bacteria. For fungal root rot, ensure proper soil drainage and avoid overwatering. Preventive measures include using a sterile potting mix, avoiding soil contact with the plant’s stem, and maintaining a healthy root system through proper care.
By understanding common pests and diseases, implementing preventive measures, and employing organic pest control methods when necessary, you can safeguard your Dieffenbachia from harm and ensure its continued health and beauty. Remember, a healthy plant is a resilient plant, capable of fending off threats when given the proper care and attention.
Propagation Techniques for Expanding Your Collection
Dieffenbachia can be propagated using two primary methods: stem cuttings and division. These methods allow you to expand your collection and share this stunning plant with others.
Stem Cuttings: A Beginner-Friendly Propagation Method
Stem cuttings stand as a simple and effective propagation technique for Dieffenbachia, enabling you to create new plants from existing ones. This method proves particularly well-suited for healthy plants with ample foliage.
Selecting Healthy Stems: Choose robust stems that measure at least 4-6 inches in length and possess several nodes, the points from which leaves emerge. Avoid stems that exhibit a woody texture or signs of pests or diseases.
Rooting in Water: Prepare a clean glass or jar filled with room-temperature water. Immerse the cut end of the stem into the water, ensuring at least one node remains submerged. Position the container in a bright, indirect light location and refresh the water every few days to prevent stagnation.
Rooting in Soil: Prepare a pot filled with well-draining potting mix. Dip the cut end of the stem into the rooting hormone, a substance that encourages root development. Insert the stem into the potting mix, ensuring at least one node is buried. Thoroughly water the soil and place the pot in a warm, humid environment.
Potting the New Plant: Once roots have developed, typically within a few weeks, you can transfer the new plant into a larger container filled with well-draining potting mix. Water the newly potted plant generously and monitor its progress closely as it adapts to its new surroundings.
Dividing: A Method for Mature Plants
As Dieffenbachia matures, it may experience overcrowding in its current pot. Division, the process of separating the plant into multiple sections, presents a solution to this issue while simultaneously providing you with additional plants.
Removing the Plant from the Pot: Gently remove the Dieffenbachia from its pot, shaking off excess soil. Gently loosen the root ball by teasing apart the roots.
Separating the Root Clump: Carefully divide the root clump into sections, ensuring each section retains a healthy portion of roots and at least one stem.
Potting Individual Sections: Prepare individual pots with a well-draining potting mix. Plant each section of the root clump into a pot, ensuring the roots are adequately covered with soil. Provide each newly potted plant with thorough watering.
Additional Tips for Successful Propagation
Humidity: Dieffenbachia flourishes in humid environments. To enhance humidity during propagation, place a plastic bag or cloche over the pot or container.
Temperature: Maintain a warm temperature, ideally around 70-80°F, to promote root development.
Patience: Propagation is a process that requires time. Exercise patience and allow the roots to develop adequately before transplanting the new plants.
By implementing these techniques, you can successfully propagate Dieffenbachia and expand your collection of these stunning and versatile houseplants. Take delight in the process of watching your new plants grow and flourish, adding a touch of tropical elegance to your indoor spaces.
People also read
Frequently Asked Questions
How long does it take for Dieffenbachia to grow to its maximum height?
Dieffenbachia growth stages vary depending on the species and ideal conditions for Leopard Lily growth. With proper care and propagation tips, it can grow between 3′ to 5′ indoors. It takes several years to reach its maximum height.
Can Dieffenbachia be grown in outdoor gardens?
Is Dieffenbachia suitable for outdoor gardens? Yes, it can be grown outdoors in warm climates with filtered sunlight and well-draining soil. Care tips include avoiding frost, watering when soil is dry, and fertilizing during the growing season.
Is pruning necessary for Dieffenbachia and if so, how often?
Pruning is important for Dieffenbachia to maintain its shape and encourage bushy growth. It should be done every 6-8 weeks by removing the top 1-2 inches of stem. This helps to prevent legginess and promotes overall plant health.
How often should the soil be changed for Dieffenbachia?
Soil change frequency for Dieffenbachia depends on the pot size and soil type. Generally, repot every 1-2 years with fresh potting mix. Choose a pot that allows for 1-2 inches of space around the root ball.
What are some natural remedies for common issues with Dieffenbachia, such as pests or fungal infections?
To combat common issues with Dieffenbachia, natural remedies such as neem oil or rubbing alcohol can be used for pest control. Fungal infections can be treated with a mixture of baking soda and water. Regularly inspecting and cleaning the plant can also prevent issues.
Conclusion
The Leopard Lily, also known as Dieffenbachia, is a beautiful and popular houseplant that can thrive in less-than-ideal conditions. With its unique leaf patterns and ability to grow up to 5 feet indoors, it’s no wonder that many people choose to add this plant to their collection. However, it’s important to note that this plant is toxic to pets and humans if ingested, so care must be taken to keep it out of reach.
To care for the Leopard Lily, it’s important to provide it with adequate light, water, and fertilizer. It prefers bright, indirect sunlight and should be watered when the top inch of soil is dry. Fertilizer should be added every 2-3 months during the growing season. Additionally, it’s important to keep the plant clean and free from dust and debris.
Common issues with the Leopard Lily include yellowing leaves, root rot, and pests. These issues can be addressed by adjusting watering habits, repotting the plant, and using insecticidal soap to get rid of pests.
With proper care, the Leopard Lily can be a beautiful and low-maintenance addition to any home. In conclusion, the Leopard Lily is a stunning houseplant that requires some care and attention to thrive. With the right amount of light, water, and fertilizer, it can grow up to 5 feet tall and add beauty to any room. However, it’s important to take precautions to keep it out of reach of pets and children.
By following the tips outlined in this article, you can keep your Leopard Lily healthy and strong for years to come. As the saying goes, ‘A little care goes a long way in nurturing a plant.’