Table of Contents
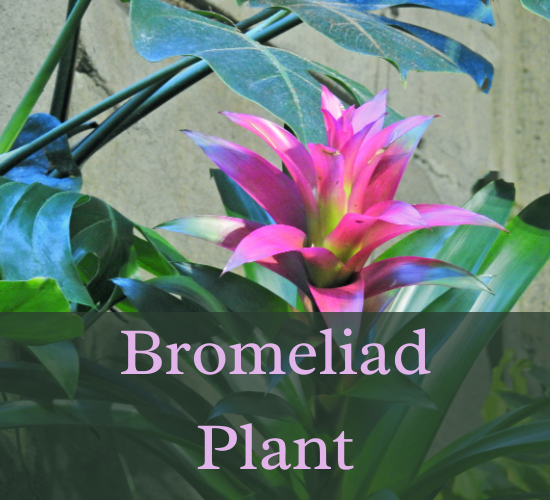
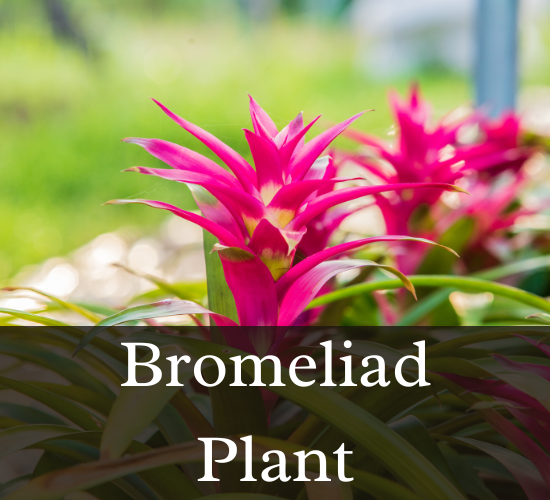
Why Bromeliad turning yellow
Welcome to the world of bromeliads, a diverse and fascinating group of plants known for their vibrant colors and unique characteristics. In this chapter, we will delve into the intriguing world of bromeliads, focusing specifically on the common issue of yellowing leaves.
What Causes Yellow Leaves in Bromeliads?
Bromeliads, with over 3,000 known species, are renowned for their stunning foliage. However, improper soil moisture is one of the primary reasons for yellowing leaves in bromeliads. Overwatering can lead to waterlogged roots while underwatering results in dry, stressed plants.
Low humidity levels are another culprit, as bromeliads thrive in humid environments. Insufficient humidity can cause their leaves to dry out and turn yellow. Additionally, incorrect lighting conditions—such as too much direct sunlight—can also lead to leaf discoloration.
Improper Soil Moisture
Proper moisture levels in the soil are crucial for the well-being of bromeliads. When it comes to watering your plants, finding the right balance is key. Overwatering can lead to waterlogged roots, suffocating the plant and causing leaves to turn yellow and wilt. Conversely, underwatering can result in dry, stressed plants with similarly yellowed foliage.
Low Humidity Levels
Bromeliads are natives of humid environments, thriving in moisture-rich air. When placed in areas with low humidity, such as heated homes or dry climates, these plants can suffer. The lack of moisture in the air causes their leaves to lose hydration, resulting in yellowing and browning at the tips.
Overwatering and Underwatering Effects
The effects of overwatering and underwatering cannot be understated when it comes to bromeliads. Overwatering not only deprives the roots of necessary oxygen but also leads to nutrient leaching, causing leaves to yellow and feel mushy. On the other hand, underwatering deprives the plant of vital moisture, resulting in dry, crispy leaves that turn yellow and eventually brown.
Natural Leaf Aging
Just like any living organism, Bromeliad undergoes a natural aging process. As the plant matures, its older leaves will naturally yellow and eventually die off. This process is normal and should not be cause for concern unless it affects a significant portion of the plant or occurs rapidly.
Other Contributing Factors
Several other factors can contribute to the yellowing of bromeliad leaves, ranging from environmental conditions to pests and diseases. Temperature fluctuations, especially extreme cold or heat, can stress the plant and lead to discoloration. Additionally, pests such as spider mites or mealybugs, as well as fungal or bacterial infections, can manifest as yellow spots or patches on the leaves.
Understanding these diverse factors that can cause bromeliad leaves to turn yellow empowers you to take proactive measures in caring for your plants. In the upcoming chapters, we will delve deeper into the signs and symptoms of yellowing leaves, along with effective solutions to revive your bromeliads to their former vibrancy.
Common Data on Bromeliad Yellowing Issues
Here is a table summarizing the most common and useful data on the topic of bromeliad leaves turning yellow:
| Topic | Description |
|---|---|
| Causes of Yellow Leaves | Improper soil moisture: Overwatering leads to waterlogged roots, underwatering results in dry, stressed plants. |
| Low humidity levels: Bromeliads thrive in humid environments; insufficient humidity dries out leaves. | |
| Incorrect lighting conditions: Excessive direct sunlight can cause leaf discoloration. | |
| Signs of Yellowing Leaves | Yellowing along leaf edges: Common sign of stress, starts subtly and spreads inward. |
| Wilting and drooping: Leaves lose rigidity, and new growth may become distorted. | |
| Impaired flowering: Yellowing affects bloom quality, resulting in smaller, less colorful blooms. | |
| Vulnerability to pests: Weakened plants are more susceptible to pests and diseases. | |
| Visual Indicators of Stress | Wilting and drooping: Leaves lose rigidity, and plant growth may slow down. |
| Wilting and drooping: Leaves lose rigidity, new growth may become distorted. | |
| Impaired flowering: Smaller, less colorful blooms or prolonged blooming. | |
| Practical Solutions | Yellowing along edges: Starts subtly, and extends inward over time. |
| Increasing humidity: Mimic humid environments indoors for healthier leaves. | |
| Adjusting lighting: Provide bright, indirect sunlight for optimal growth. | |
| Pruning yellowed leaves: Trim with clean scissors for aesthetic appeal and plant health. | |
| Identifying Insect Infestations | Mealybugs: Small, white, cotton-like pests often in leaf axils. |
| Scale Insects: Shell-like bumps on leaves or stems, causing yellowing and stunted growth. | |
| Spider Mites: Webbing on undersides of leaves, yellow stippling. | |
| Aphids: Soft-bodied insects with new growth, curled leaves, and honeydew residue. | |
| Repotting Guidelines | Signs for repotting: Root damage or rot, plant outgrowing current pot. |
| Post-repotting care: Keep in the shade, and resume watering after acclimation. | |
| Post-repotting care: Keep in the shade, and resume watering after acclimation. | |
| Preventative Measures | Quarantine new plants: Monitor new additions before introducing them to the collection. |
| Air circulation: Ensure good airflow to prevent fungal growth. | |
| Quarantine new plants: Monitor new additions before introducing them to collection. | |
| Ideal Conditions for Bromeliads | Temperature: 60-90°F (15-32°C) with low humidity, thrive in bright, indirect light. |
| Natural Remedies for Pests | Neem oil: Effective natural insecticide for common pests. |
| Pyrethrin: Another natural option for treating insect infestations. | |
| Companion planting: Herbs like mint and basil can deter pests naturally. | |
| Propagation Techniques | Using pups: Offshoots from the main plant can be replanted for new growth. |
| Improper soil moisture: Overwatering leads to waterlogged roots, and underwatering results in dry, stressed plants. |
This table provides a comprehensive overview of the causes, signs, practical solutions, and preventative measures for addressing yellowing leaves in bromeliads. Understanding these factors is crucial for maintaining the health and vibrancy of these unique plants.
Signs and Symptoms of Yellowing Leaves
As a bromeliad enthusiast, being attuned to the subtle signals of leaf distress can make all the difference in maintaining the health and vitality of your cherished plants. Yellowing leaves, often an early indicator of underlying issues, warrant careful observation and prompt action.
Visual Indicators of Stress
Yellowing Along Leaf Edges:
- One of the most common signs of stress in bromeliads is the appearance of yellowing along the edges of the leaves.
- This yellowing often starts subtly, manifesting as a slight discoloration that gradually extends inward.
Wilting and Drooping Leaves:
- Stressed bromeliad leaves may exhibit signs of wilting or drooping, losing their characteristic rigidity.
- When you notice your plant’s leaves losing their usual turgor, it’s a clear sign that something is amiss.
Changes in Leaf Texture:
- Pay close attention to any changes in the texture of the leaves.
- Yellowing leaves may feel softer or appear less vibrant than usual, signaling a decline in plant health.
Understanding Leaf Color Changes
Gradual Yellowing vs. Sudden Discoloration:
- Not all instances of yellowing leaves are cause for immediate concern.
- Gradual yellowing, starting from the leaf edges and progressing inward, often indicates ongoing stress from environmental factors or watering issues.
- Conversely, sudden and widespread yellowing can point to more acute problems such as nutrient deficiencies or pest infestations.
Browning and Necrosis:
- As stress intensifies, yellowing leaves may transition to a brown or necrotic state.
- Brown spots or patches on the leaves signify tissue damage, often caused by improper watering, fungal infections, or pest activity.
Color Patterns and Symmetry:
- Take note of the patterns of yellowing across the plant.
- Uniform yellowing on all leaves might suggest a systemic issue, while asymmetrical yellowing could indicate localized stress from pests or diseases.
Health Impact on the Overall Plant
Stunted Growth and Reduced Vigor:
- Untreated yellowing leaves can lead to stunted growth and a noticeable decline in the overall vigor of your bromeliad.
- The plant may appear less robust, with new growth slowing down or becoming distorted.
Impaired Flowering and Bloom Quality:
- Bromeliads rely on healthy foliage to produce vibrant blooms.
- Yellowing leaves can disrupt the flowering process, resulting in smaller, less colorful blooms or a prolonged blooming period.
Vulnerability to Secondary Issues:
- A weakened plant with yellowing leaves becomes more susceptible to secondary problems.
- Pests and diseases are quick to take advantage of stressed plants, further exacerbating the situation.
By honing your observational skills and recognizing these signs of leaf distress early on, you can intervene effectively to restore your bromeliad’s vitality. In the upcoming chapters, we will delve into targeted solutions and care practices tailored to address these specific symptoms of yellowing leaves.
Solutions to Revive Yellowing Bromeliad Leaves
As a bromeliad enthusiast, witnessing the vibrant green leaves of your prized plant take on a yellow hue can be concerning. Fear not, for there are effective solutions to revive those yellowing leaves and restore your bromeliad to its former glory.
Proper Watering Techniques
Watering Frequency:
- Assess the moisture level of the soil before watering to avoid overwatering.
- Stick to a consistent watering schedule, allowing the soil to dry slightly between waterings.
- Opt for watering from the top to ensure the entire root system receives moisture.
Soil Drainage:
- Ensure the pot has proper drainage holes to prevent water accumulation.
- Use a well-draining potting mix specifically designed for bromeliads.
- Elevate the pot slightly to allow excess water to escape freely.
Water Quality:
- Use filtered or rainwater to avoid mineral buildup from tap water.
- If tap water is the only option, allow it to sit overnight to dissipate chlorine and fluoride.
Increasing Humidity Levels
Humidity Trays:
- Place your bromeliad pot on a tray filled with pebbles and water to create a humid microenvironment.
- The evaporating water will increase the humidity around the plant without causing waterlogged soil.
Misting:
- Regularly mist the leaves with room temperature water, especially during dry periods.
- Avoid misting late in the day to prevent prolonged leaf wetness overnight.
Grouping Plants:
- Cluster your bromeliads together to create a natural humidity zone.
- The collective transpiration of plants increases local humidity levels.
Light and Placement Considerations
Ideal Light Conditions:
- Position your bromeliad in bright, indirect light for optimal growth.
- Avoid placing it in direct sunlight, which can scorch the leaves and lead to yellowing.
Rotating the Plant:
- Rotate your bromeliad periodically to ensure even light exposure on all sides.
- This prevents one side from receiving too much or too little light.
Adjusting Indoor Conditions:
- If growing indoors, consider using grow lights to supplement natural light.
- Monitor the intensity and duration of light to mimic its natural habitat.
Pruning and Maintenance Practices
Removing Yellowed Leaves:
- Trim off any yellowed or brown leaves using clean, sharp scissors or shears.
- Cut at an angle to mimic the natural shape of the leaf for aesthetic appeal.
Inspecting for Pests:
- Regularly inspect the plant, especially the undersides of leaves, for signs of pests.
- Treat any infestations promptly with natural or chemical solutions as needed.
Cleanliness:
- Keep the plant and its surroundings clean to prevent bacterial or fungal growth.
- Remove debris from the soil surface and prune dead or decaying plant material.
By implementing these targeted solutions, you can address the underlying causes of yellowing leaves in your bromeliad. Remember, patience and attentive care are key to nurturing your plant back to health. In the upcoming chapters, we will delve deeper into additional care tips and best practices for thriving bromeliads.
A Closer Look at Common Pests and Diseases
In the intricate world of bromeliads, where lush green foliage meets vibrant blooms, there lurk potential threats in the form of pests and diseases. Understanding these common adversaries is crucial for safeguarding the health and vitality of your prized plants.
Identifying Insect Infestations
Mealybugs (Pseudococcidae):
- These small, white, cotton-like pests often congregate in the leaf axils and along the stems.
- Look for fuzzy white patches or a cottony residue, particularly on the undersides of leaves.
Scale Insects (Coccoidea):
- Scale insects present themselves as tiny, shell-like bumps adhering to the leaves or stems.
- They can vary in color from brown to black, and their presence may cause leaf yellowing and stunted growth.
Spider Mites (Tetranychidae):
- These minuscule arachnids are often indicated by fine webbingon the plant, especially on the undersides of leaves.
- Leaf stippling, or tiny yellow dots, is a common symptom of spider mite infestations.
Aphids (Aphididae):
- Aphids are small, soft-bodied insects that cluster on the tender new growth of bromeliads.
- Look for curled leaves, sticky honeydew residue, and the presence of ants, which often farm aphids for their sugary secretions.
Impact of Fungal and Bacterial Issues
Leaf Spot Fungus:
- Leaf spot fungi manifest as circular, dark lesions on the foliage of bromeliads.
- These spots can coalesce, leading to widespread yellowing and browning of leaves.
Root Rot (Phytophthora, Pythium):
- Excessive moisture in the growing medium can create a hospitable environment for root rot pathogens.
- Symptoms include wilting, yellowing leaves, and a foul odor emanating from the soil.
Bacterial Soft Rot (Erwinia):
- This bacterial infection causes soft, water-soaked lesions on the leaves of bromeliads.
- Affected areas rapidly deteriorate, turning mushy and dark as the infection spreads.
How Pests and Diseases Affect Leaf Health
Impaired Nutrient Absorption:
- Pests such as mealybugs and scale insects feed on the sap of bromeliads, robbing the plant of essential nutrients.
- This nutrient deficiency often manifests as yellowing leaves and stunted growth.
Disruption of Photosynthesis:
- Spider mites and aphids, with their piercing-sucking mouthparts, can disrupt the process of photosynthesis.
- Reduced chlorophyll production leads to pale, yellowed leaves and diminished overall plant vigor.
Tissue Damage and Decay:
- Fungal and bacterial infections compromise the structural integrity of bromeliad leaves.
- As these pathogens proliferate, they cause tissue necrosis, resulting in unsightly brown lesions and leaf death.
Armed with the knowledge of these common pests and diseases, you can take proactive measures to protect your bromeliads. In the upcoming chapters, we will explore targeted strategies and effective treatments to combat these threats and ensure the flourishing of your botanical beauties.
Additional Care Tips for Healthy Bromeliads
Ensuring the health and vitality of your bromeliad goes beyond addressing immediate issues like yellowing leaves. Here, we delve into additional care tips and best practices to keep your bromeliad thriving.
Fertilization Guidelines
Choosing the Right Fertilizer:
- Opt for a balanced, water-soluble fertilizer specifically formulated for bromeliads.
- Look for fertilizers with a low concentration of nitrogen to prevent leaf burn.
Frequency of Fertilization:
- Feed your bromeliad during its active growing season, typically from spring to early autumn.
- Apply fertilizer every 2 to 4 weeks, following the manufacturer’s instructions for dilution.
Application Methods:
- Dilute the fertilizer to half or quarter strength to prevent over-fertilization.
- Water the plant thoroughly after fertilizing to distribute nutrients evenly.
Repotting Strategies
Signs it’s Time to Repot:
- Notice roots growing out of the drainage holes or circling the pot’s edges.
- The soil remains consistently soggy despite proper watering practices.
- The plant has outgrown its current container, becoming top-heavy or unstable.
Steps for Repotting:
- Prepare a new pot with fresh, well-draining potting mix designed for bromeliads.
- Gently remove the bromeliad from its current pot, taking care not to damage the roots.
- Shake off excess soil and inspect the roots for any signs of damage or rot.
- Place the bromeliad in the center of the new pot and fill with fresh soil, firming it gently around the roots.
- Water lightly to settle the soil and place the plant in its preferred location.
Post-Repotting Care:
- Keep the newly repotted bromeliad in a shaded area for a few days to reduce stress.
- Resume regular watering after a week, allowing the plant to acclimate to its new environment.
Seasonal Considerations for Bromeliad Care
Winter Care:
- Reduce watering frequency during the winter months when growth slows.
- Place the bromeliad in a warmer area away from drafts or cold windows.
Summer Care:
- Increase humidity levels during hot, dry summers by misting the plant more frequently.
- Provide adequate air circulation to prevent heat stress and fungal issues.
Flowering Season Care:
- Support the plant’s flowering by maintaining consistent care routines.
- Avoid moving the plant or changing its environment during the flowering period.
Special Bromeliad Species Care
Blushing Bromeliad (Neoregelia)
- Keep the central cup filled with water to maintain humidity.
- Provide bright, indirect light to encourage vibrant leaf colors.
Bromeliad Pineapple (Ananas comosus)
- Ensure well-draining soil to prevent root rot.
- Water the base of the plant, avoiding the central cup to prevent stagnation.
Air Plants (Tillandsia)
- Mist the leaves with water 2-3 times a week, ensuring they dry completely within 4 hours.
- Soak the plant in room temperature water for 20-30 minutes every 2 weeks.
Preventative Measures for Common Issues
Regular Inspection:
- Check your bromeliad regularly for signs of pests or diseases.
- Promptly treat any issues with natural remedies or horticultural oils.
Proper Air Circulation:
- Ensure adequate air circulation around the plant to prevent fungal growth.
- Use a small fan on low setting to promote air movement indoors.
Quarantine New Plants:
- Isolate new bromeliad additions for a few weeks to monitor for pests or diseases.
- Inspect the new plant thoroughly before introducing it to your collection.
By incorporating these additional care tips into your bromeliad care routine, you can create an environment where your plant not only survives but thrives. The joy of nurturing these remarkable plants lies in the journey of learning and adapting to their unique needs.
Frequently Asked Questions
Can Bromeliads survive in low light conditions?
Bromeliads can survive in low light conditions, but they may not thrive. They require bright, indirect light for optimal growth and flowering. Low light can result in slower growth and smaller flowers. Bromeliad lighting needs should be considered when selecting a location for these plants.
How often should I fertilize my Bromeliad?
Fertilizer frequency for bromeliads depends on the plant’s growth and maturity stage. Use a balanced fertilizer at half-strength and apply every 2-3 months during the growing season. Organic fertilizers or slow-release granules are best for bromeliads.
What is the ideal temperature range for Bromeliads?
Bromeliads thrive in warm temperatures between 60-90°F with low humidity. They can survive in low light conditions but prefer bright, indirect sunlight for optimal growth. Maintaining the ideal temperature range and providing adequate light can promote healthy Bromeliad growth.
Are there any natural remedies to treat insect infestations on Bromeliads?
Natural insecticides such as neem oil and pyrethrin can be used to treat insect infestations on bromeliads. Companion planting with herbs like mint and basil can also deter pests. However, it is important to follow instructions carefully to avoid harming the plant.
Can Bromeliads be propagated by cutting their leaves or pups?
Bromeliads can be propagated through the use of pups or by cutting the leaves and rooting them in the soil. The rooting process involves removing the lower leaves and allowing the cut to callus over before planting in well-draining soil. Propagation techniques can vary depending on the specific species of bromeliad.
Conclusion
In conclusion, yellowing leaves on bromeliads can be caused by a variety of factors, including improper soil moisture, low humidity, and insect infestations. It is important to identify the specific cause of the issue in order to properly address it. Solutions may include adjusting watering habits, increasing humidity levels, and treating pests.
It is also important to regularly monitor the health of your bromeliad and address any issues promptly in order to maintain its vibrant and thriving appearance.
Overall, with the proper care and attention, bromeliads can be a beautiful and rewarding addition to any indoor or outdoor space. By following the tips and suggestions outlined in this article, you can help ensure the long-term health and vitality of your bromeliad.
Remember always to be vigilant and proactive in caring for your plant, and you will be rewarded with many years of enjoyment and beauty.
1 thought on “Save Your Bromeliad Turning Yellow: Tips To Fix Yellowing Leaves”